

【コピペでOK】Gmailのドラフト作成まで完結!"ビジネスメール作成GPT"の作り方

本記事では、Actions にGmailを連携してGmail上にドラフトメールを作成するGPTの作り方を紹介します。
このGPTを使用することで、日常のメール作業を効率化し、時間を節約できます。
例えば、以下のような指令を出すことで:
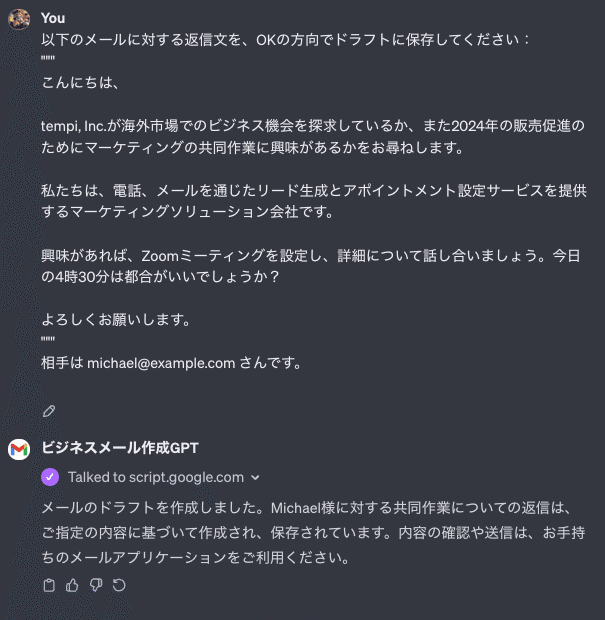
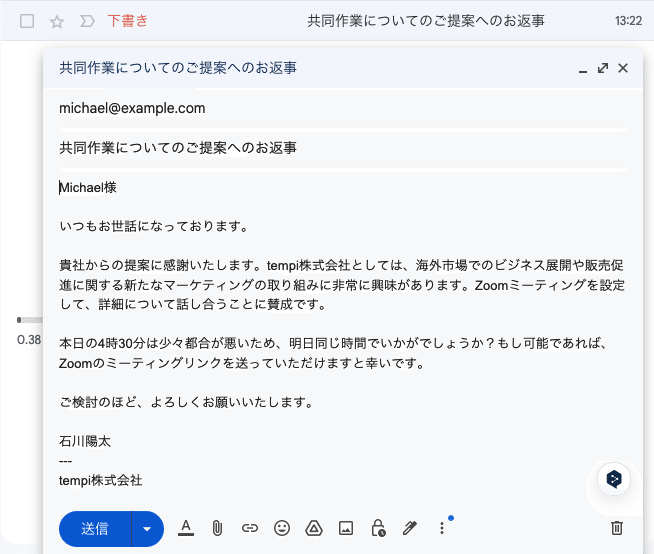
Gmail上に自動で以下のようにドラフトメールが保存されるようになります:
ちょっと修正して、あとは送信ボタンを押すだけ!
重要な点として、GAS + GPTs のシステム構成だとサーバー代、GPT代ともにゼロコストで運用できます。
ビジネスメール作成GPTの作り方
それでは早速、作り方をみていきます。
Step 1. Google Apps Script を作成する
以下のサイトにアクセスして、新しいプロジェクトをクリックします。
重要な点として、このGoogle Apps Scriptを作成したGoogleアカウントに紐づくGmailアカウントにドラフトメールが作成されることになります。
まず、元々書いてあるコードを全て削除したのち、以下のコードをすべて貼り付けます。
function createEmailDraft_(args) {
 const { recipients, subject, body, cc } = args;
 const draft = GmailApp.createDraft(recipients, subject, body, cc ? { cc: cc } : {});
 return `Draft created with ID: ${draft.getId()}`;
}


function doPost(e) {
 try {
   if (!e.postData) {
     throw new Error("No post data received");
   }
   const requestBody = JSON.parse(e.postData.contents);
   const result = createEmailDraft_(requestBody)
   return ContentService.createTextOutput(result).
     setMimeType(ContentService.MimeType.JSON);
 } catch (error) {
   return ContentService.createTextOutput(
     JSON.stringify({ "error": error.toString() })
   ).setMimeType(ContentService.MimeType.JSON);
 }
}
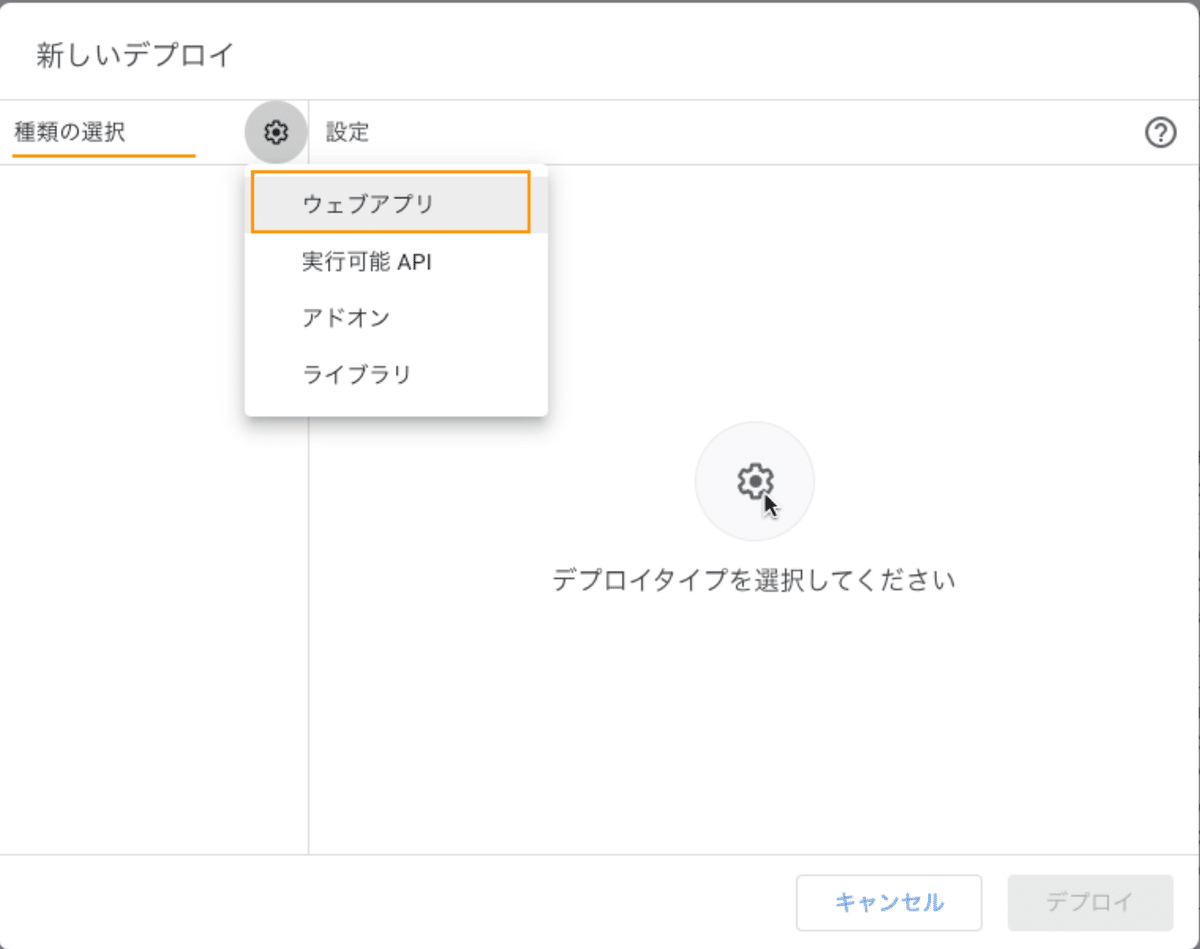
Step 2. Google Apps Script をデプロイする
続いて、このスクリプトをデプロイします。
「種類の選択」で「ウェブアプリ」 を選択後、
「次のユーザーとして実行」を「自分」に、
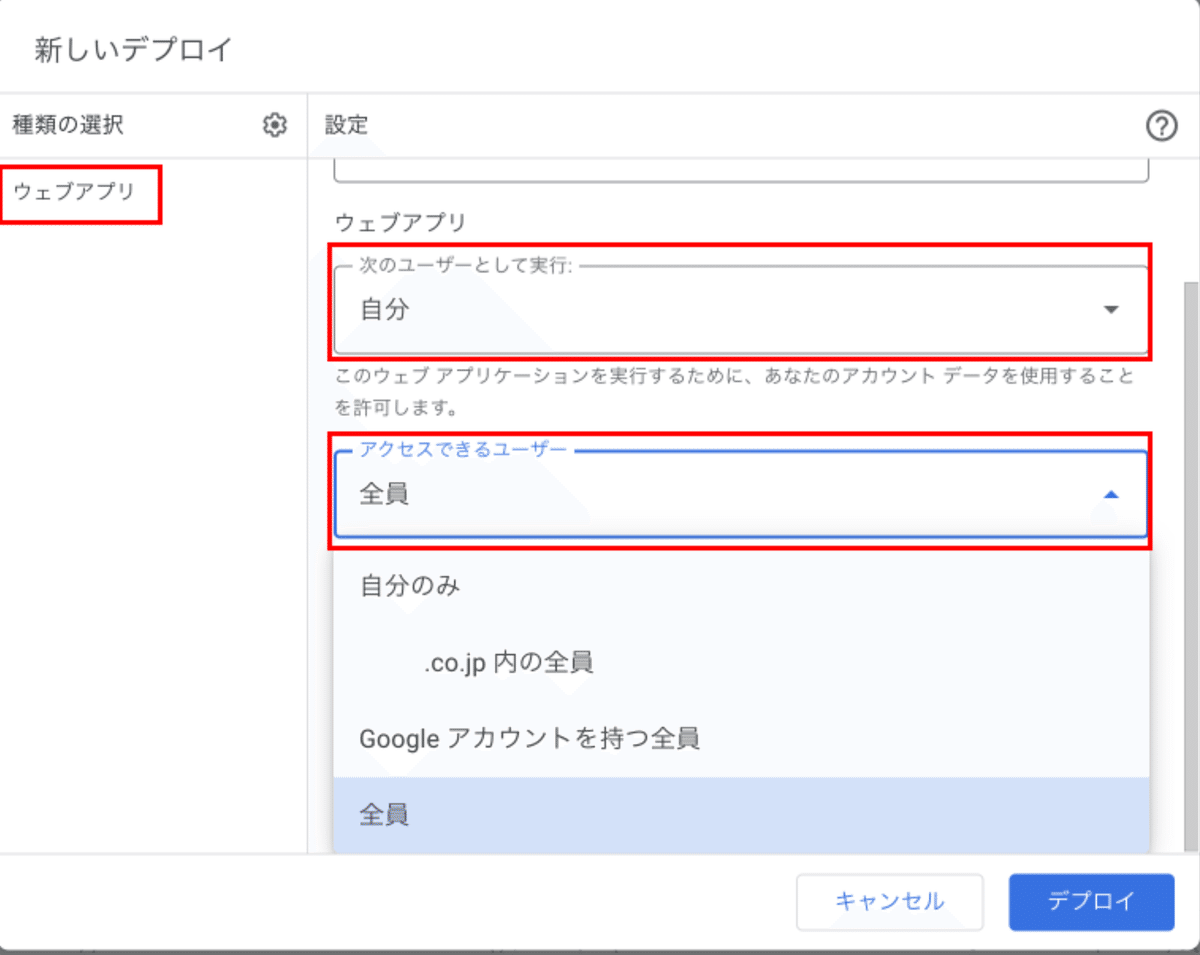
「アクセスできるユーザー」 を 「全員」 に設定します
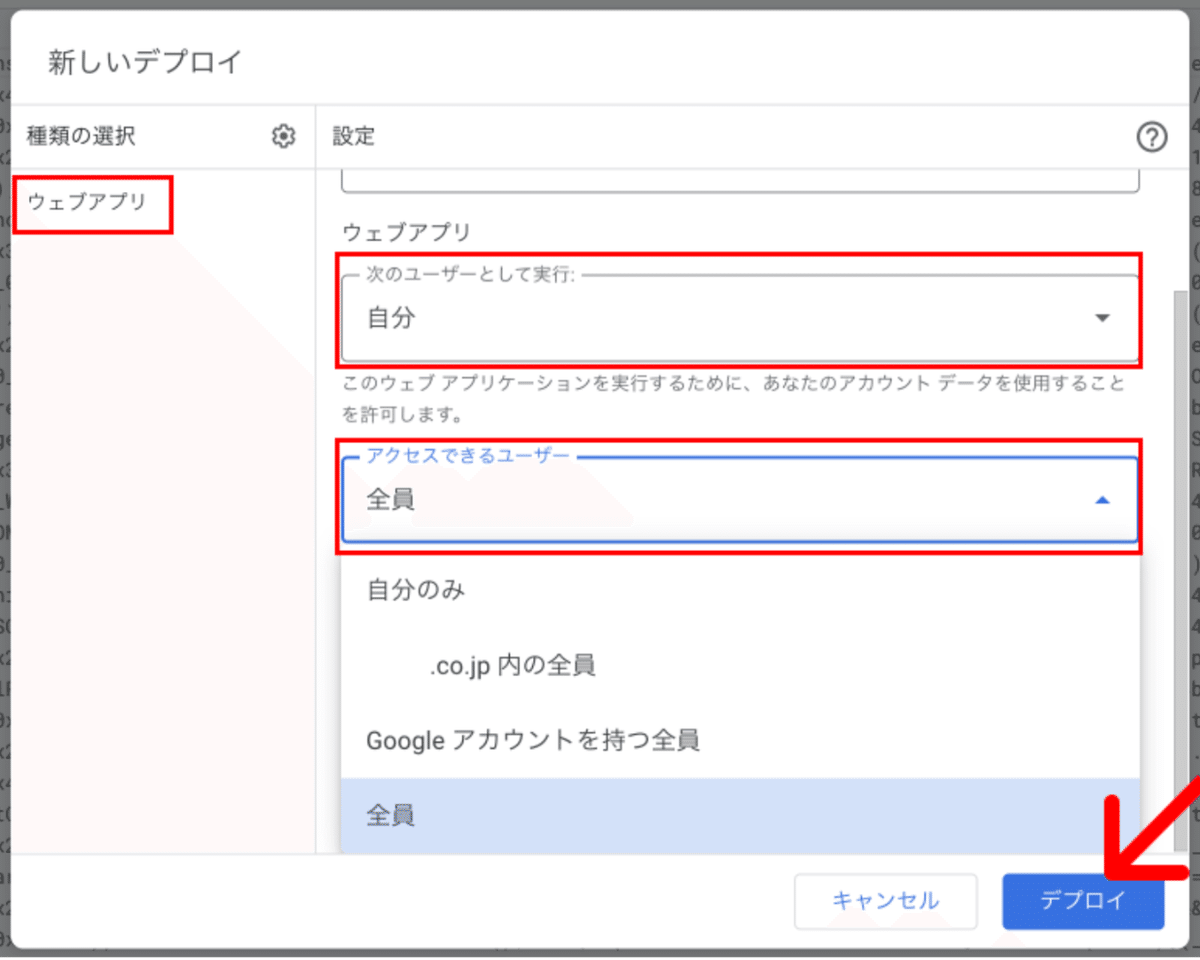
右下の「デプロイ」 をクリックします
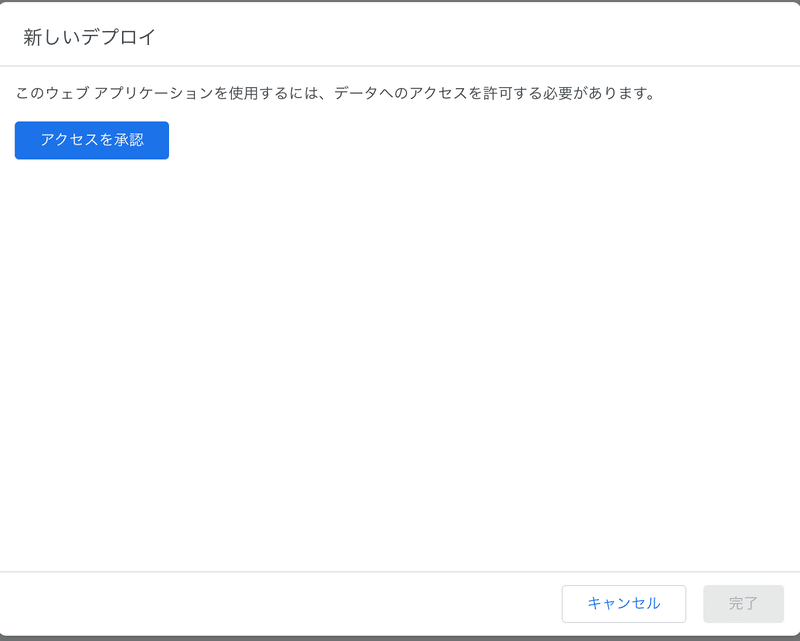
次の画面で「アクセスを承認」を押し、Googleアカウントへログインします。
備考)エンタープライズアカウント以外では、次の画面で以下のように、「このアプリはGoogleで確認されていません」という画面が出る場合があります。
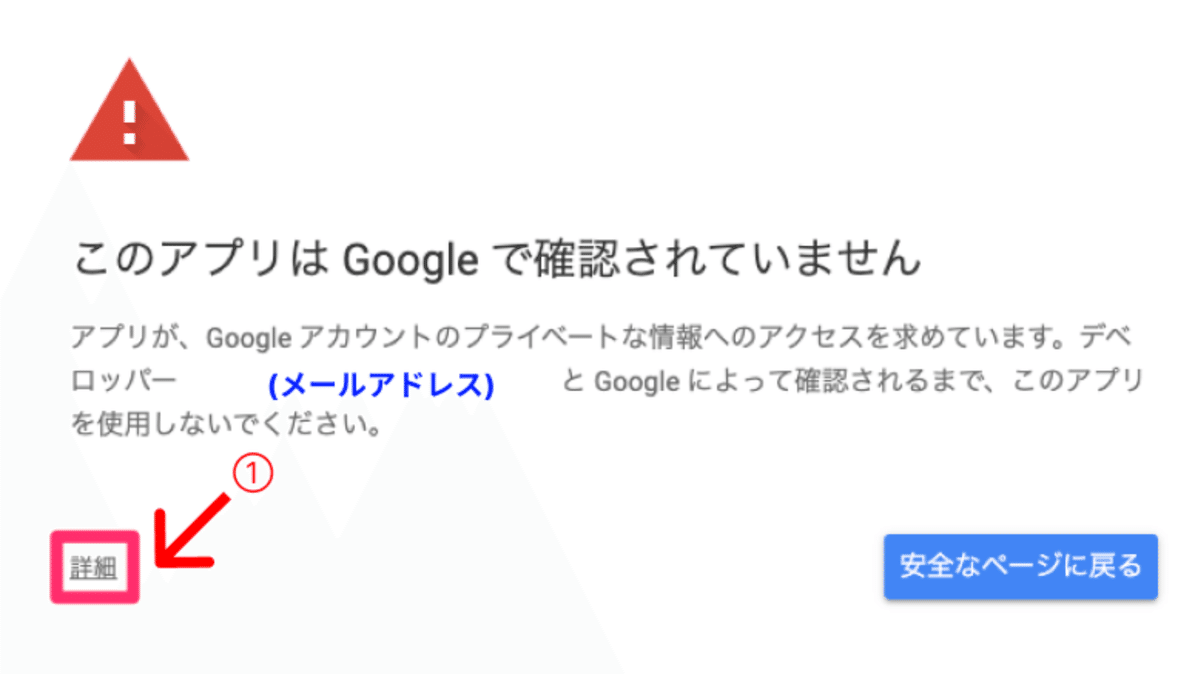
このメッセージが表示されたら、「詳細」をクリックし、「【プロジェクト名】(安全でないページ)」をクリックして進みます
カレンダーへのアクセスの許可が求められるので、許可をクリックします。
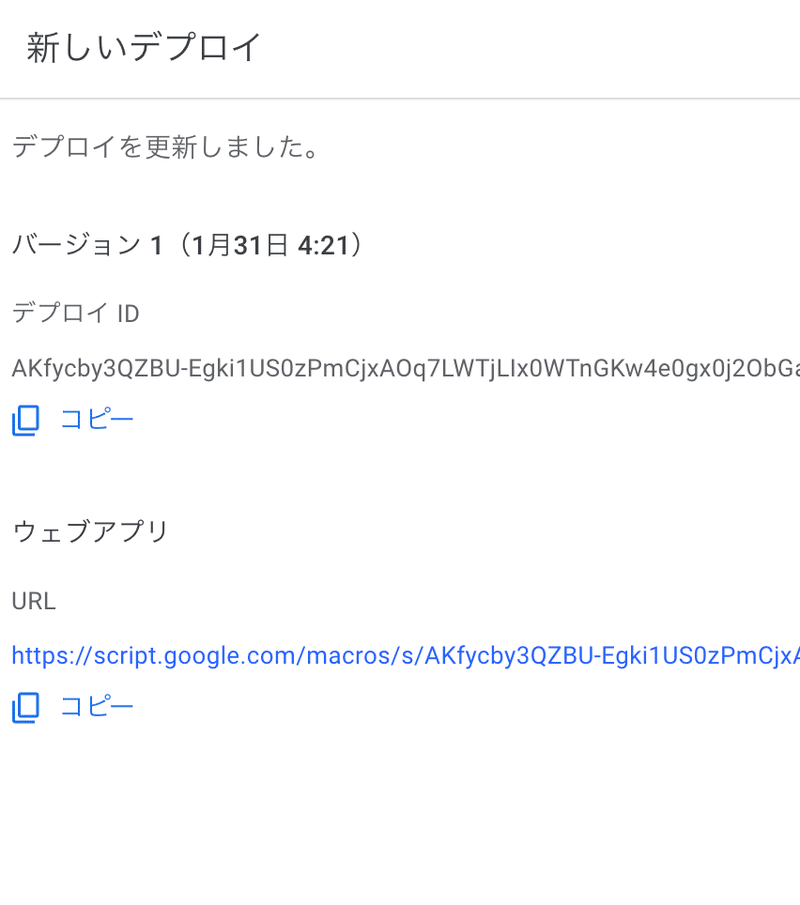
デプロイが完了すると、URL が発行されるため、この URL をコピーしておきます。
Step 3. GPTの設定を行なう
名前、画像、プロンプトなどを好きに設定します。
おすすめのプロンプトの例:
あなたは私の秘書として、ビジネス用メールを作成してください。必要に応じて、CreateEmailDraft によって、メールのドラフトを保存することができます。
# メールの文面についての指示:
- もし先方の情報があれば「Y株式会社 X様」で始めてください。「いつもお世話になっております」など入れてください。
- 名刺部分には必ず以下を入れてください:
"""
--
ABC
ABC株式会社
"""
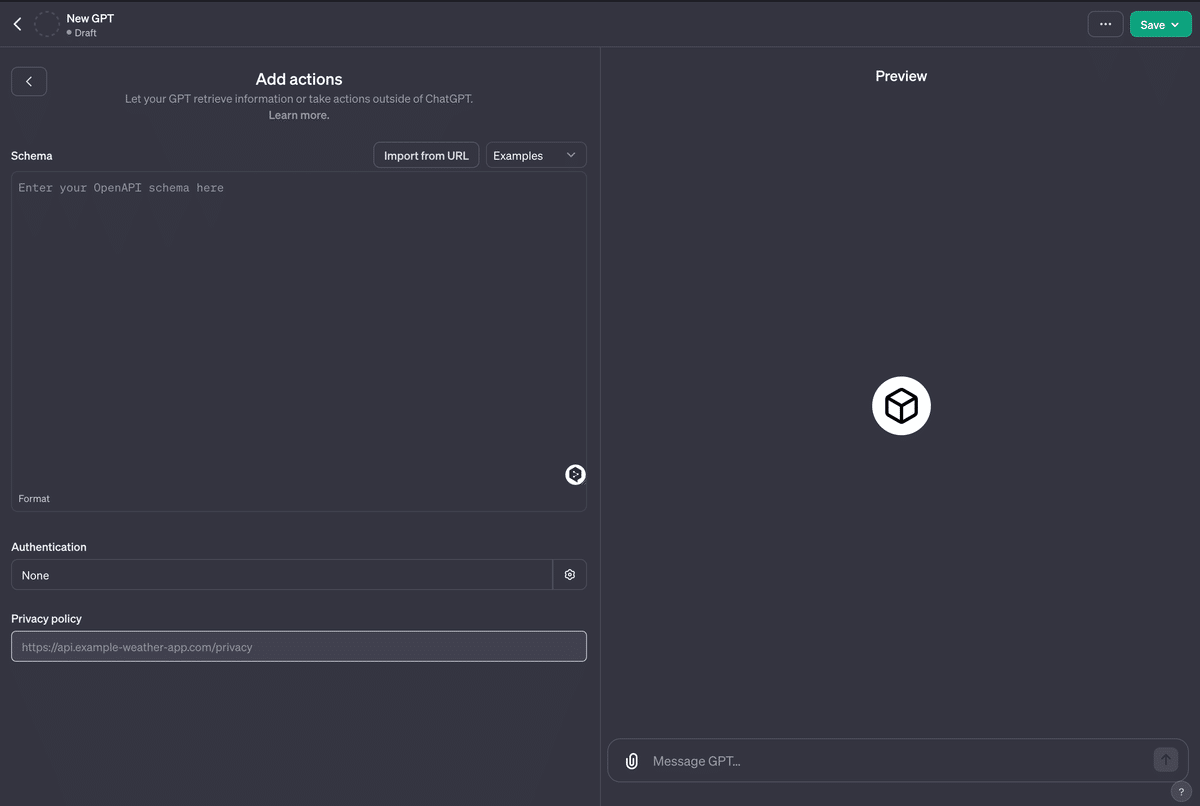
Step 4. Actions の設定を行なう
続いて、Actions を設定していきます。
まずは、[Create new action]をクリックします。以下の画面になります:
以下のYAMLファイルの「ここにデプロイしたGASのIDを挿入します」と書いてある部分を、先ほどデプロイしたGASのIDに変更したのち、Schema の欄にそのままこれをコピペします:
openapi: "3.0.0"
info:
  title: "Email Draft Creation"
  description: "API for creating email drafts using Google Apps Script."
  version: "v1.0.0"
servers:
  - url: "https://script.google.com"
paths:
  /macros/s/ここにデプロイしたGASのIDを挿入します/exec:
    post:
      operationId: "CreateEmailDraft"
      summary: "Create a new email draft"
      description: "This endpoint creates a new email draft with the specified details."
      parameters:
        - in: path
          name: scriptId
          required: true
          description: "The script ID for the Google Apps Script deployment"
          schema:
            type: "string"
      requestBody:
        required: true
        description: "Details of the email draft to be created."
        content:
          application/json:
            schema:
              type: "object"
              properties:
                recipients:
                  type: "string"
                  description: "Email address of the recipients."
                subject:
                  type: "string"
                  description: "Subject of the email."
                body:
                  type: "string"
                  description: "Body of the email."
                cc:
                  type: "string"
                  description: "Email addresses for CC."
      responses:
        '200':
          description: "Email draft successfully created."
          content:
            application/json:
              schema:
                type: "object"
                properties:
                  message:
                    type: "string"
                    description: "Success message with draft ID."
        '400':
          description: "Bad request if the request parameters are not correct."
        '500':
          description: "Internal server error."
以下の画像のようになっていればOKです:
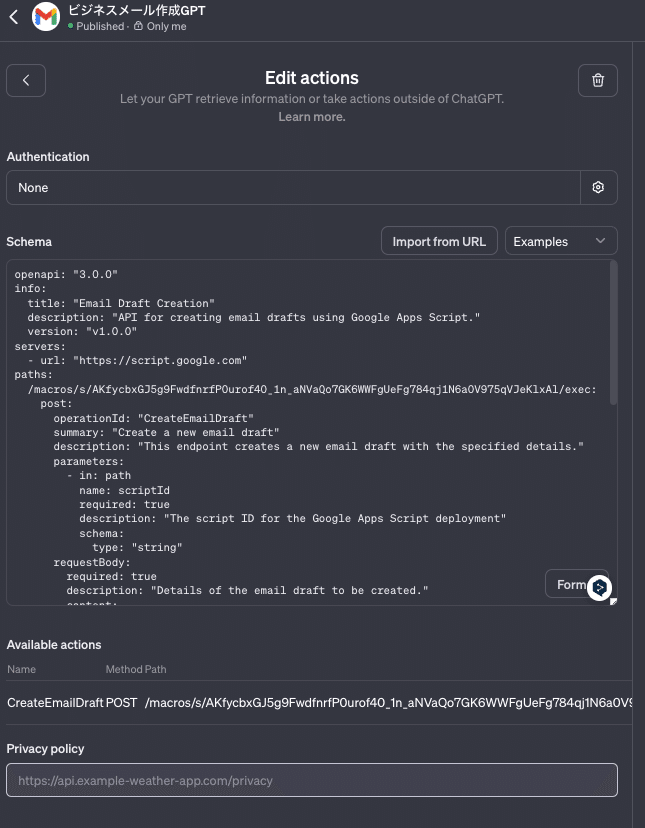
これでもう、ビジネスメール作成GPTの完成です🙌
実際に使えるか、Preview画面で確かめてみましょう!
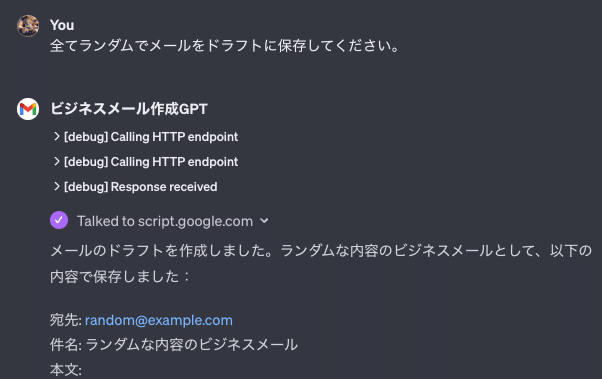
Gmailを見て、実際にドラフトメールが入っていることを確かめます:
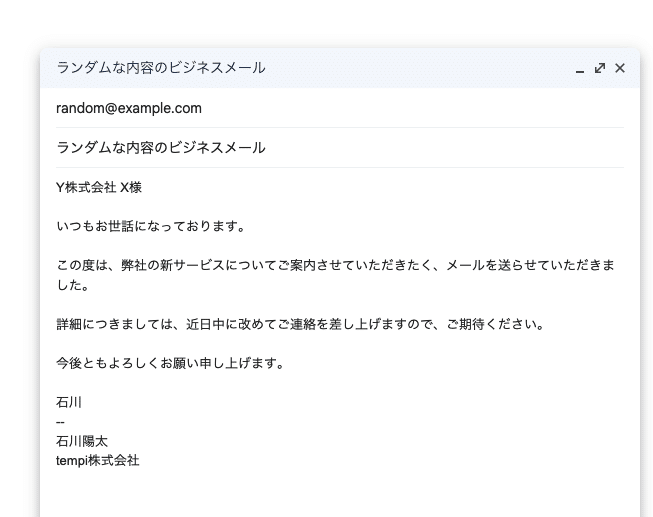
これにて完成です🎉
注意点として、このGPTは必ず、Only me でのみ利用するように注意してください。
他の人に使ってもらうものではありません。
(※そもそも Privacy Policy URL を入力していないためURLを共有することは物理的にできません)
あとは、使い倒すだけです!
サーバー代、GPT代はかからないので、いくら使っても ChatGPT Plus 代金しかかかりません。
プロンプトの部分を自社仕様に改善していくことでいろんなメールのパターンに対応できるようになります。