

【Photoshop活用事例5選】Photoshopの新機能で画像編集が変わる!

前回の記事では、Photoshopの新しいAI機能について詳しく解説しました。
今回は、それらの機能を実際に活用した5つの事例をご紹介します。
背景の入れ替え、部分的なイラスト生成、参照画像を使ったスタイル転写など、様々なシーンでPhotoshopのAI機能が活躍している様子をお伝えできればと思います。
それでは、早速5つの活用事例を見ていきましょう!
1. 背景だけ削除しFirefly image 3で色々な画像を生成
🚨Firefly Image 3 Model comes to Adobe Photoshop Beta!
— Allen T (@Mr_AllenT) April 23, 2024
Adobe released a huge update to @photoshop including it's new gen AI model, text-to-image, reference images, & many more features
Check out the new Photoshop features in the posts below!#CommunityxAdobe #Adobepartner #Ad pic.twitter.com/oDfAB5De6X
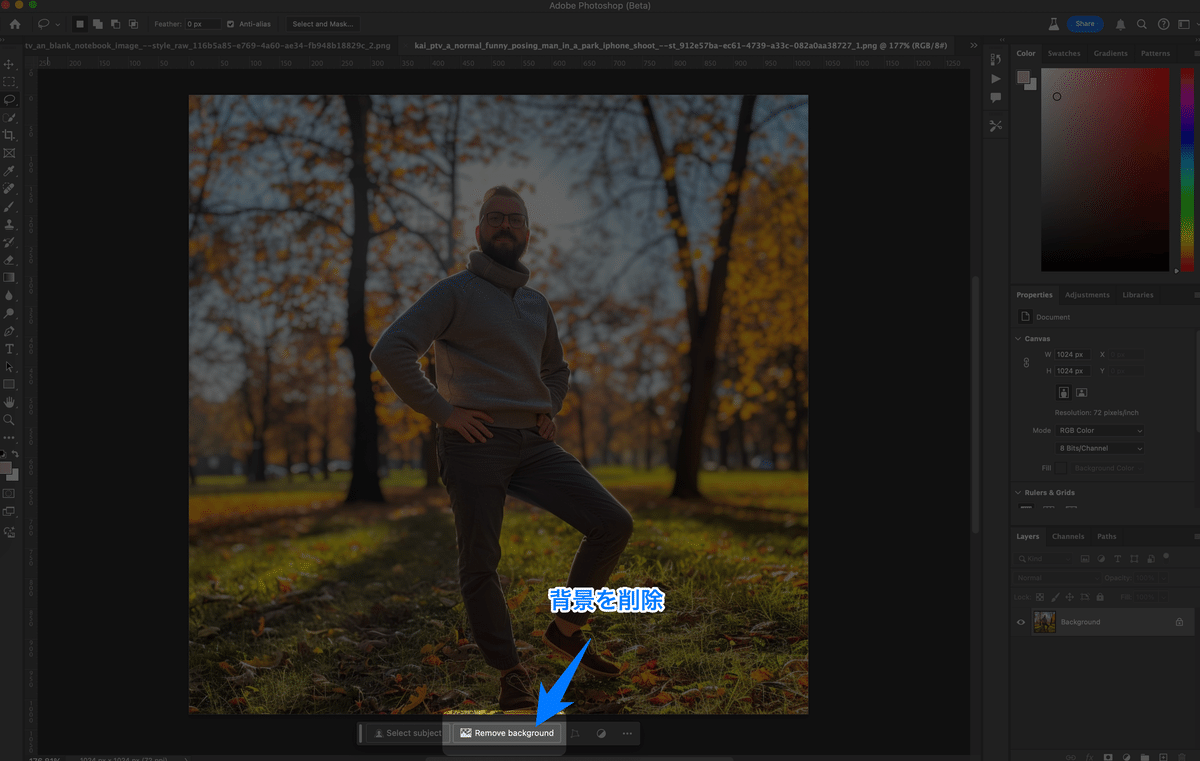
やり方
まず、背景を削除したい画像をPhotoshopで開きます。次に、画面下側のツールバーにある「背景を削除(Remove background)」ボタンをクリックします。これにより、画像の背景が自動的に削除されます。

背景が削除された状態で、画面下部の「Generate background」欄に、新しく生成したい背景画像の説明(プロンプト)を入力します。ここでは例として「月の上」と入力してみましょう。
プロンプト例:月の上
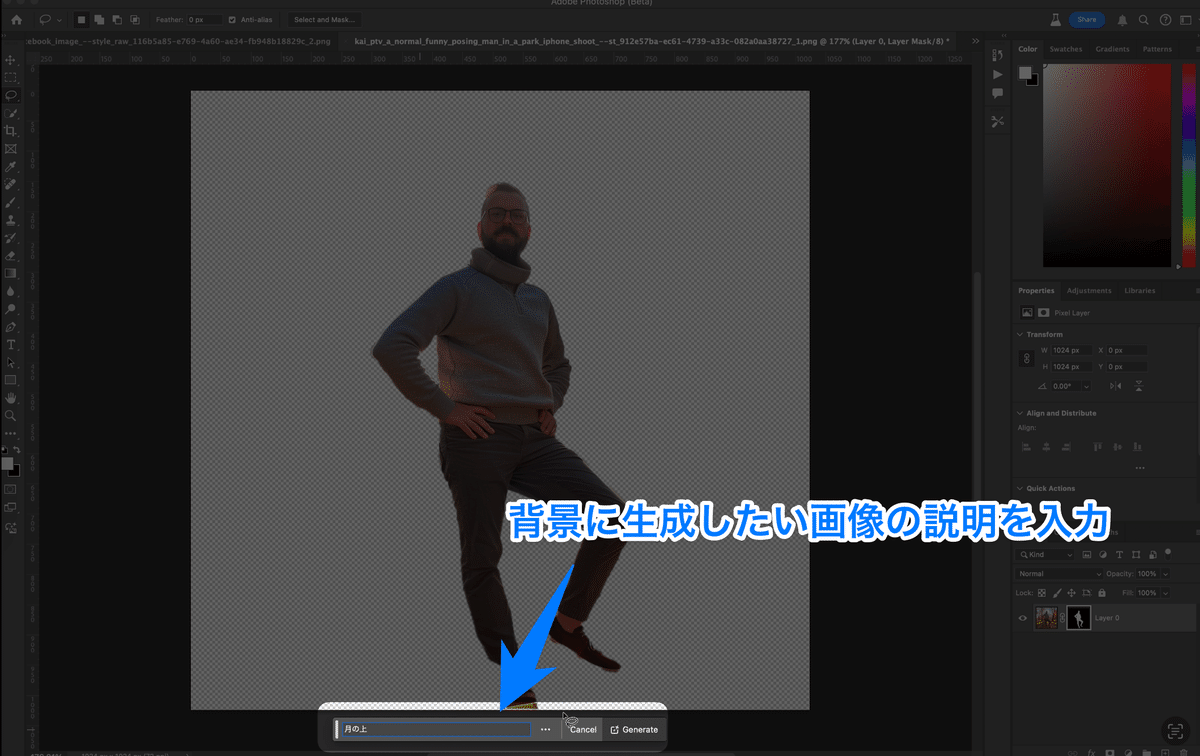
プロンプトを入力したら、「Generate」ボタンをクリックします。すると、Firefly image 3がプロンプトに沿った新しい背景画像を生成し、元の画像と合成してくれます。
このように、背景だけを削除し、Firefly image 3で新しい背景を生成することで、様々なバリエーションの画像を簡単に作ることができます。

2. ノートの一部分だけを選択し Firefly image 3でイラスト風の画像を生成
using new Adobe Firefly Image 3 in Photoshop.
— Anu Aakash (@anukaakash) April 23, 2024
> First created an blank notebook image in Photoshop using the new "Generate Image" feature.
"top view of a notebook, blank pages, beautiful office desk, flowers, water, pen"
> Next used the Generative Fill feature to create each… pic.twitter.com/cSQEE10shC
やり方